Basic Deploy Website Application in MECA with more service
Build the basic website application in MECA with more than one service
When you build or deploy website in your computer, you can only the once who can access the file. When you upload the file to docker hub ,anybody can be access your local file that will be unsecure for your computer. MECAs will helps to deploy website in namespace and have its own memory,resource,CPU and RAM. You can build any kind of website by using container or images in docker hub that suited to your website or idea then deploy it in MECA. You can also deploy more than one images at a time, to make website application fully successful.
-
In this tutorial will only deploy 1 website many service.
-
1 website 2 Deployment 2 Service
-
Joomla and Mysql
-
Joomlais a free and open-source content management system (CMS) for publishing web content.Joomla is written in PHP, uses object-oriented programming (OOP) techniques and software design patterns, stores data in a MySQL, MS SQL, or PostgreSQL database. -
MySQLis the world’s most popular open source database. With its proven performance, reliability and ease-of-use, MySQL has become the leading database choice for web-based applications.
Prerequisite
- Known basic information about web application that you want to use
- Already study basic web application in MECA with only one service
- Member of docker hub
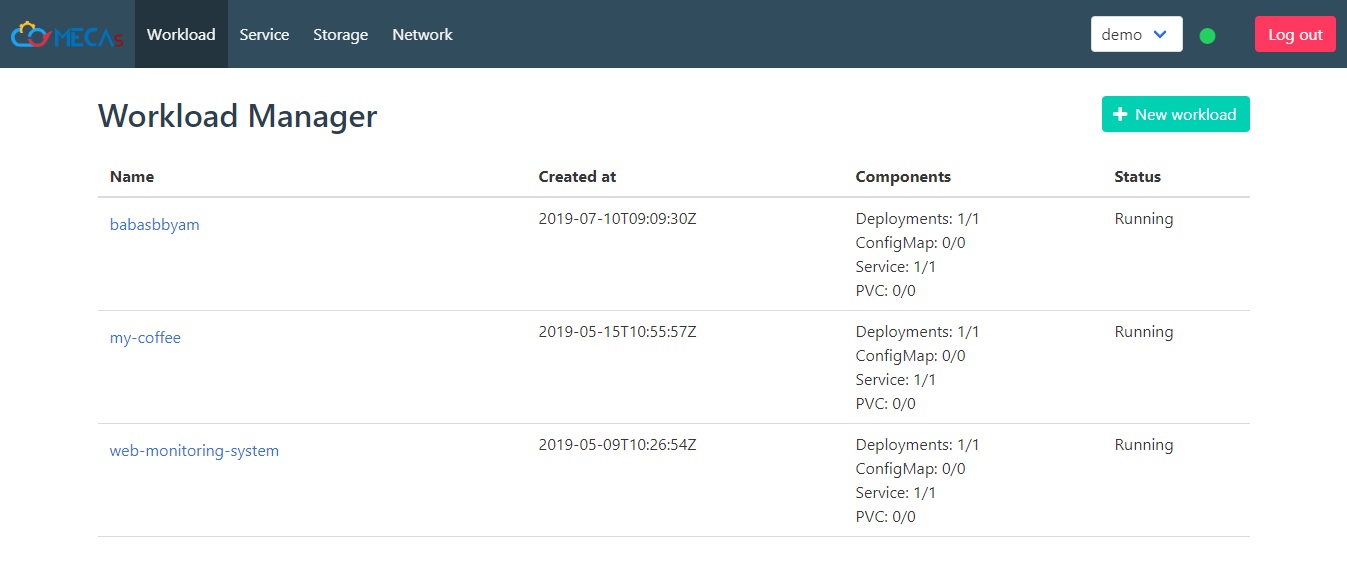
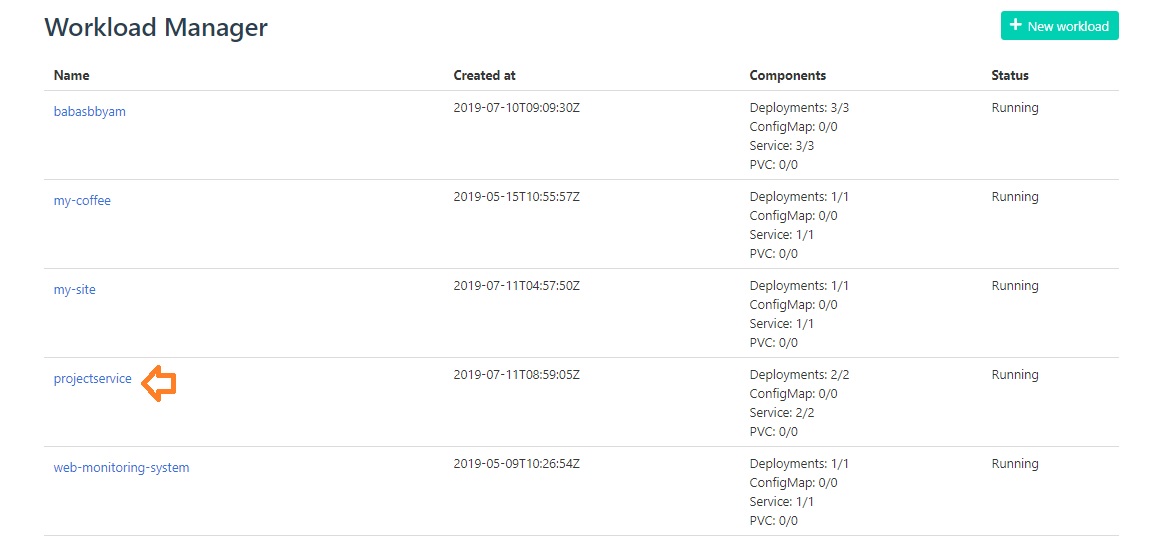
1. Click the workload tab in menubar and you will get the page like this. This page will shown all of the project website that deployed on your namespace,you can see whether its deployed successful or not. This page also show the project status too.
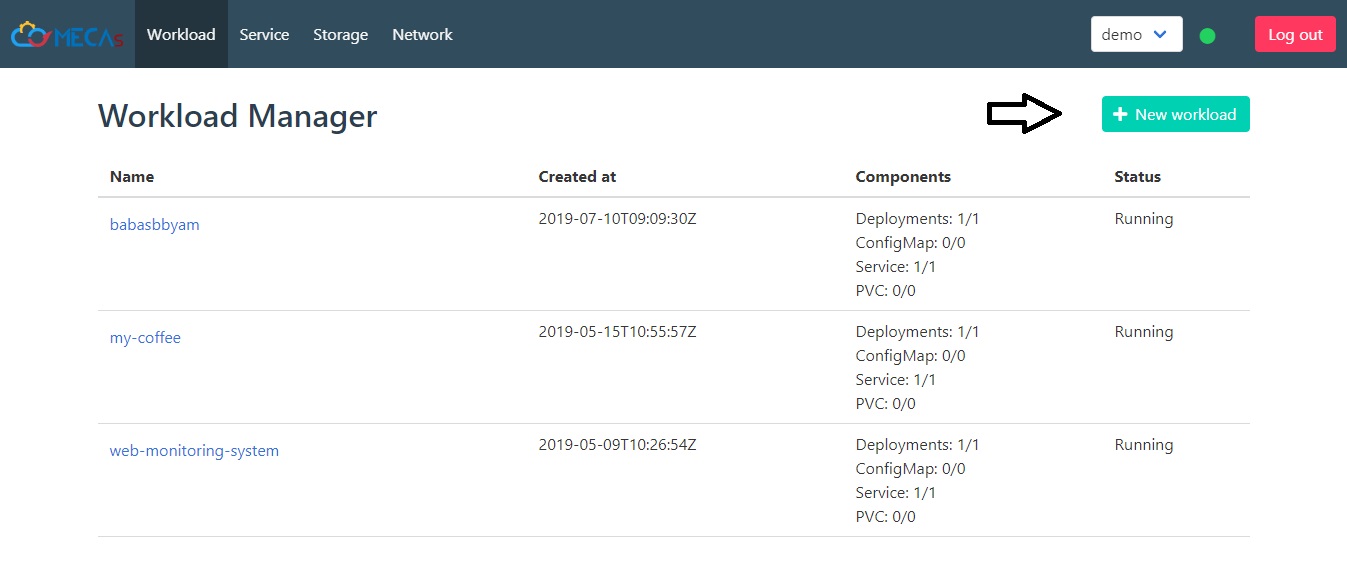
2. Click + NEW workload to start new project deploy
-
The workload can be edit later
-
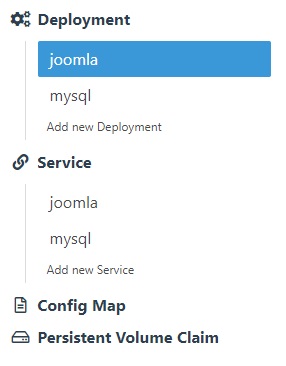
The steps belows will contain steps for the first deploy which is Joomla and second deploy which is MySQL that each of deploy include 1 service
-
Please do all of Joomla part first and then repeatedly done step 3 to step 5.3 with MySQL
-
When you already done with step 3 to step 5.3 with Joomla and MySQL, you can continue with step 6
3. Name the project on top of page and in deployment part, and it will shown in namespace workload portal
-
Note: project name and deployment name didn’t have to be the same name. Project name will be shown on workload portal with static name, 1 project name can contain many deployment name.
-
For
Joomla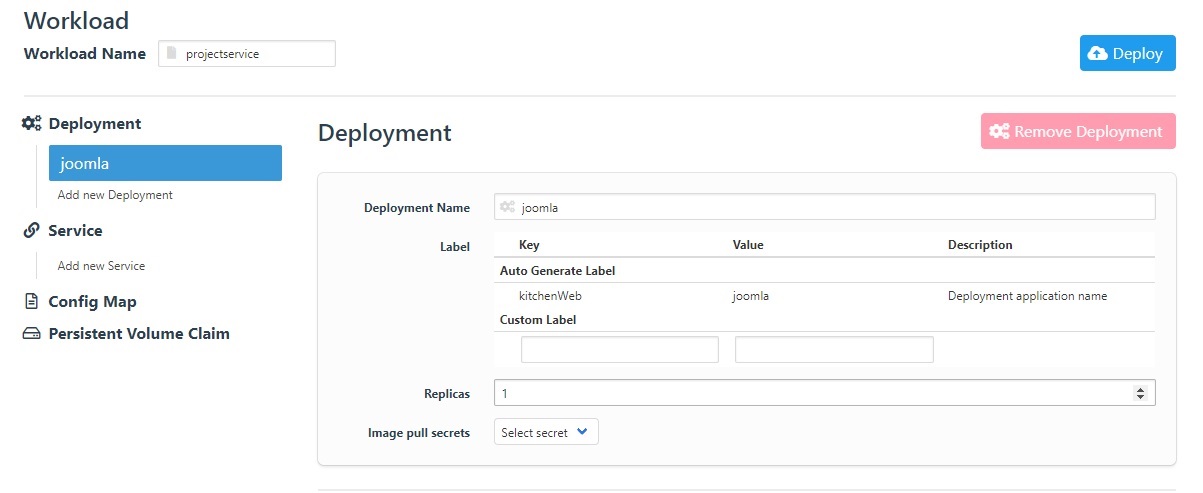
-
You can use the same workload because workload can contain many deployment
-
For
MySQL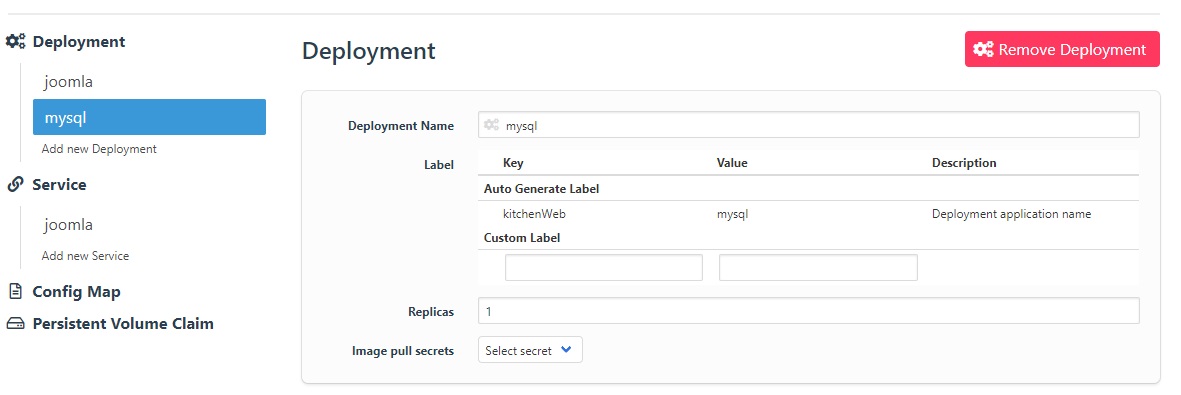
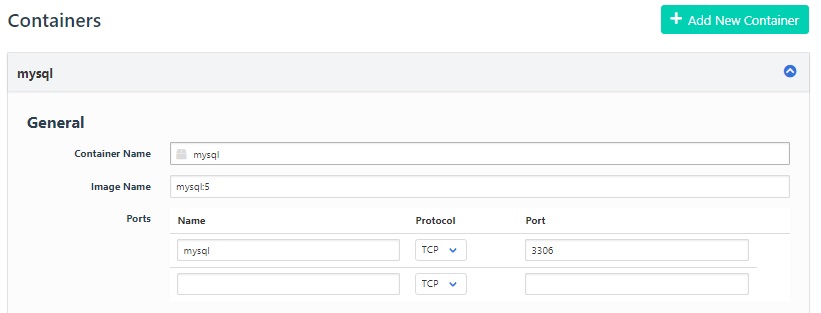
4. In Containers part
General
type in the container name and docker images that come from repository of docker hub ,it can be your images or other images that share on docker hub. If you don’t have your own image, find it in docker hub repository and get the name of images.
-
For
Joomla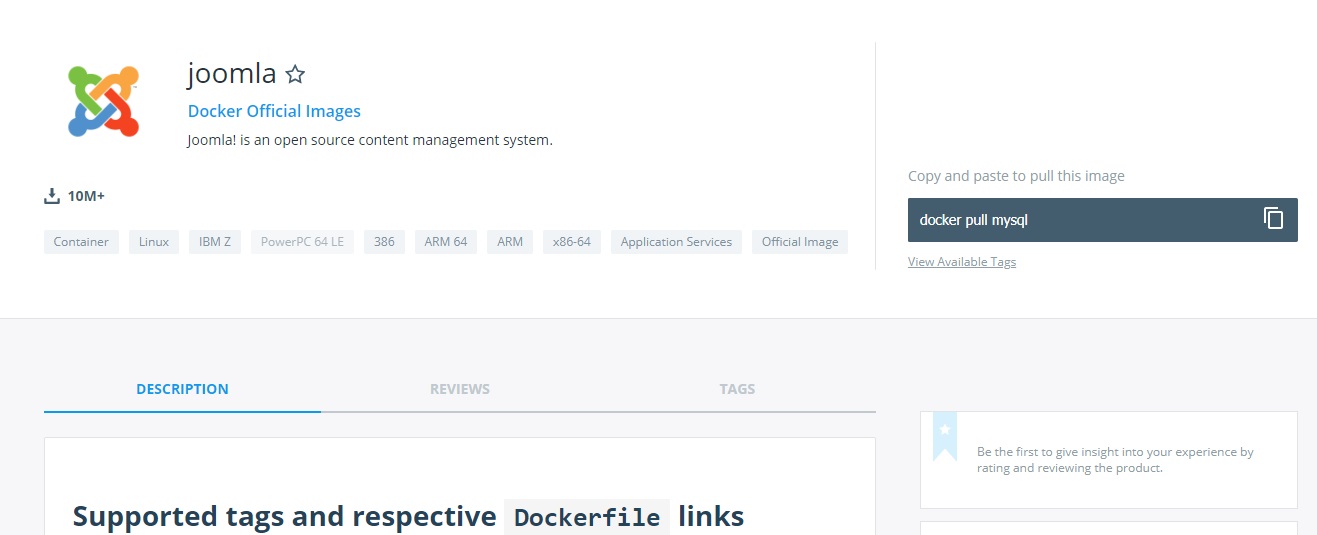
-
For
MySQL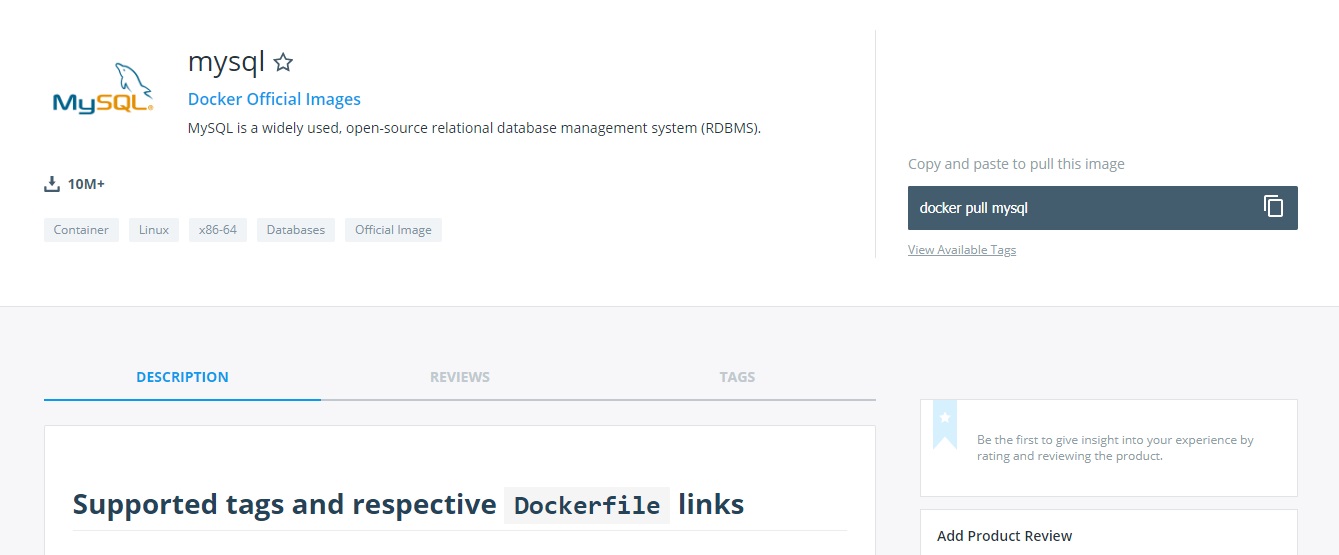
4.1 In container part fill in container name and images that you choose from docker hub or your own images.
-
Note: Container name can be freely to create and didn’t have to be the same name with docker images, deployment or project name.
-
For
Joomla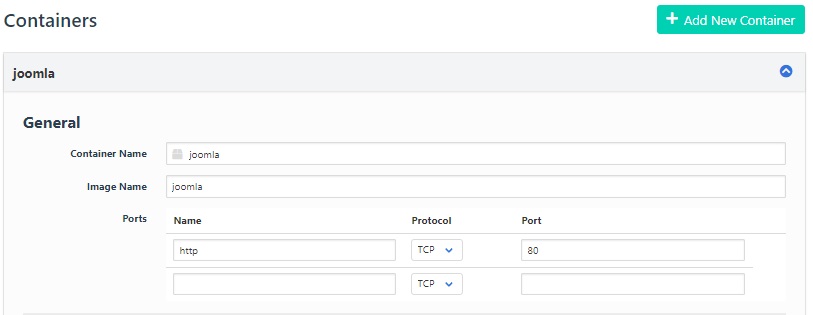
-
For
MySQL- If MySQL is error you have to change MySQL to latest version likes in this steps.
- From mysql->mysql:5
4.2 Port of the website, the name of the port will be free to create but the port number have to use the number that you run the website. Example likes you run website on https://localhost:4000 you have to type port number 4000. Default http:80
- For
Joomla- Joomla can use port number 4000 or default port of HTTP which is 80.
- Joomla can use port number 4000 or default port of HTTP which is 80.
- For
MySQL- MySQL have to use port name which is
mysqlthat is a database not the website page can’t usehttp
- MySQL have to use port name which is
Environment
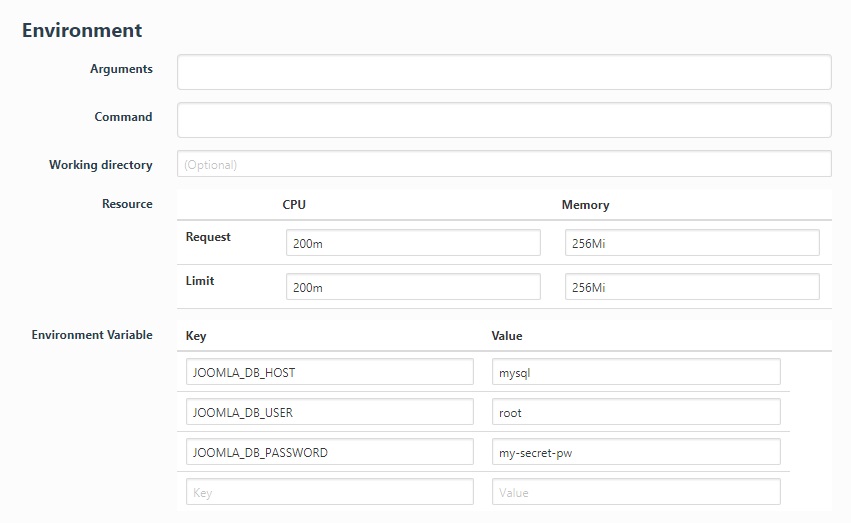
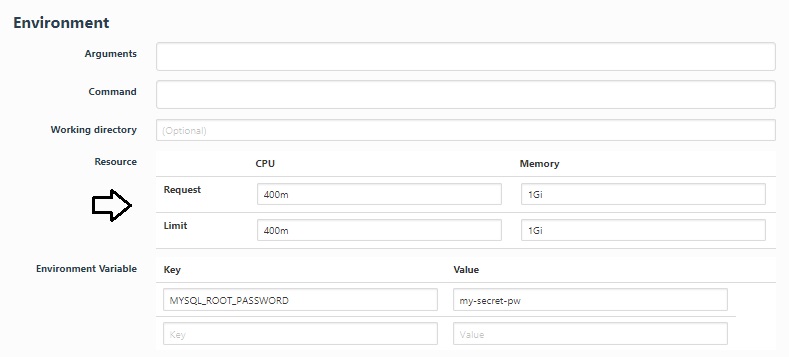
if an images in docker hub have to write a config to download or include more than one file, you have to add or type it in Environment Variable that it will tell you in detailed of repository or image that you want.
- For
Joomla. Search the web application that you want and then scroll down to “How to use images” and you will see the detail and environment config of an images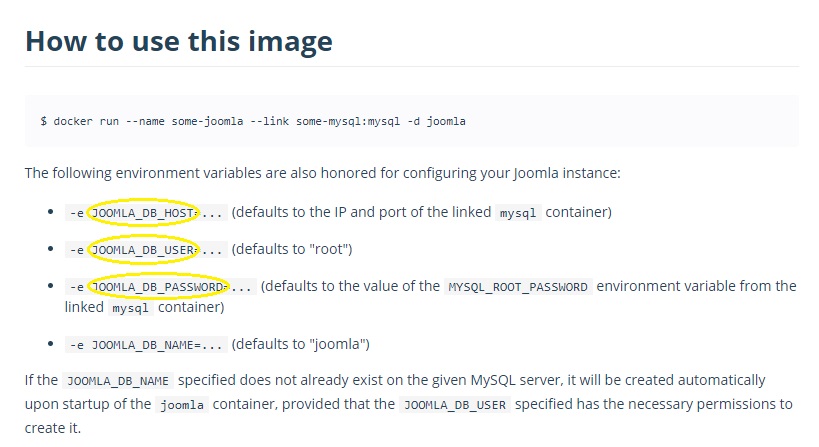
- Then copy the config or environment and fill it in the environment variable part that has key and value to fill in.
- Then copy the config or environment and fill it in the environment variable part that has key and value to fill in.
- For
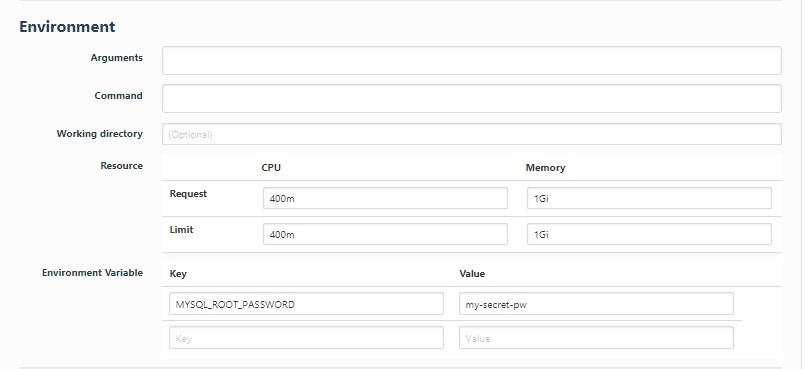
MySQL. Search the web application that you want and then scroll down to command of running docker after the command called-e ...after this command-e ...will show you an environment config and default value that you have to fill in before deploy in MECA
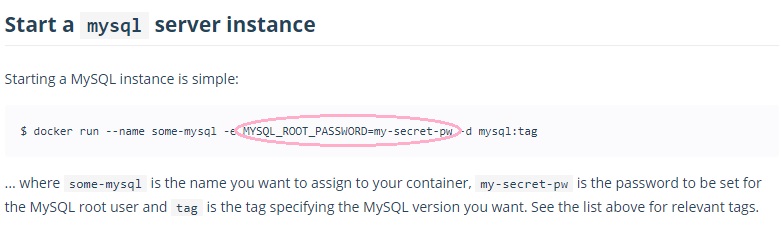
Then copy the config or environment and fill it in the environment variable part that has key and value to fill in.
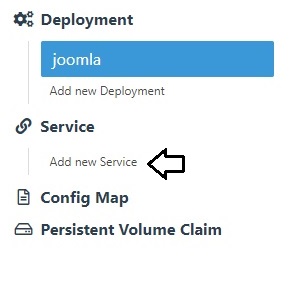
5. When you finished create deployment part you have to add a service to your deployment. If you have 2 deployment you have to add 2 service, each deployment include 1 service.
5.1 If your website using http or https you have to check the checkbox of the service.
-
For
Joomla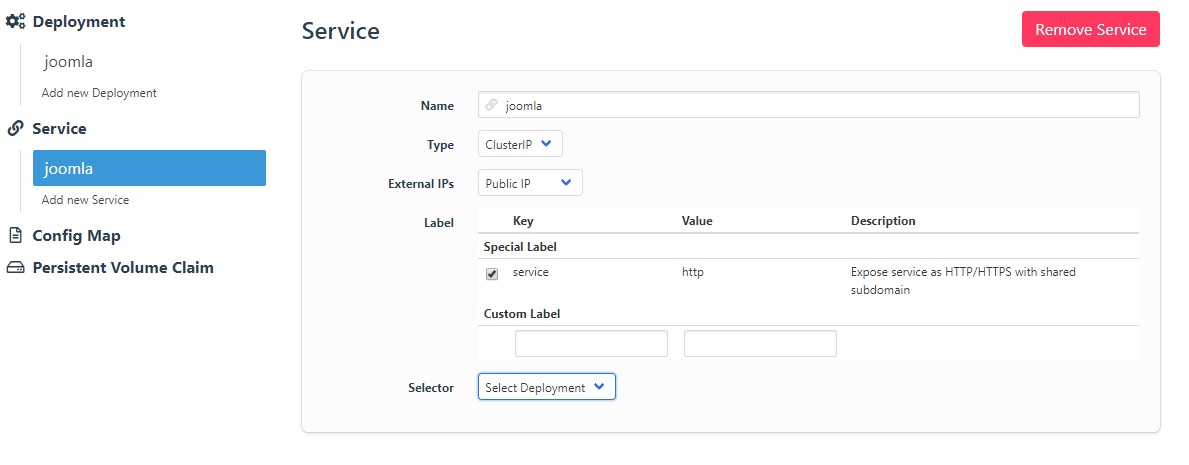
-
For
MySQL- MySQL is not a web HTTP service, it is a web database so you didn’t have to check the checkbox in service.
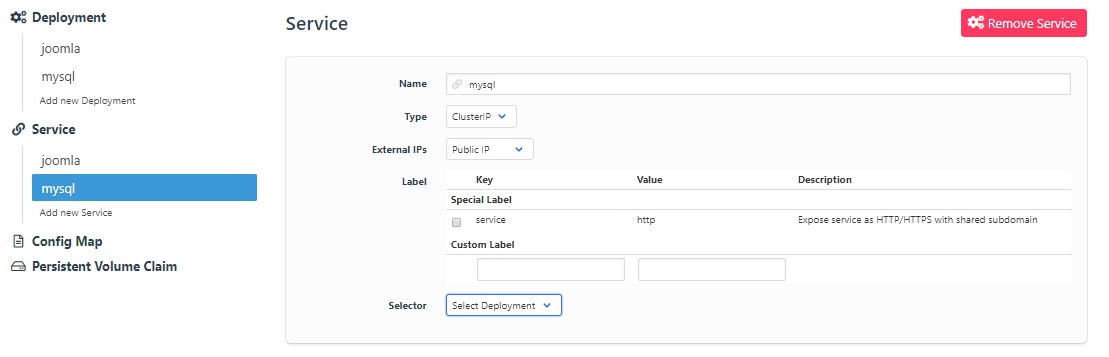
- MySQL is not a web HTTP service, it is a web database so you didn’t have to check the checkbox in service.
5.2 Select the deployment name that you want to add the service and name it. Suggested to use the same name with the deployment to make it easy to remember which service is belong to the deployment.
-
For
Joomla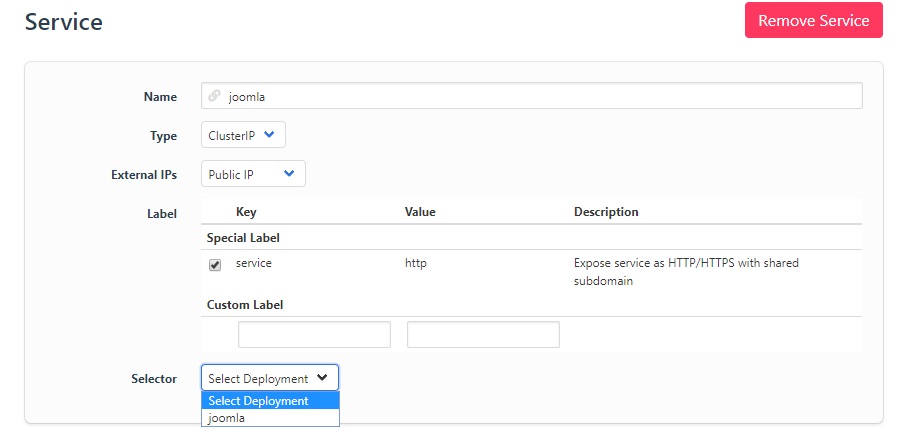
-
For
MySQL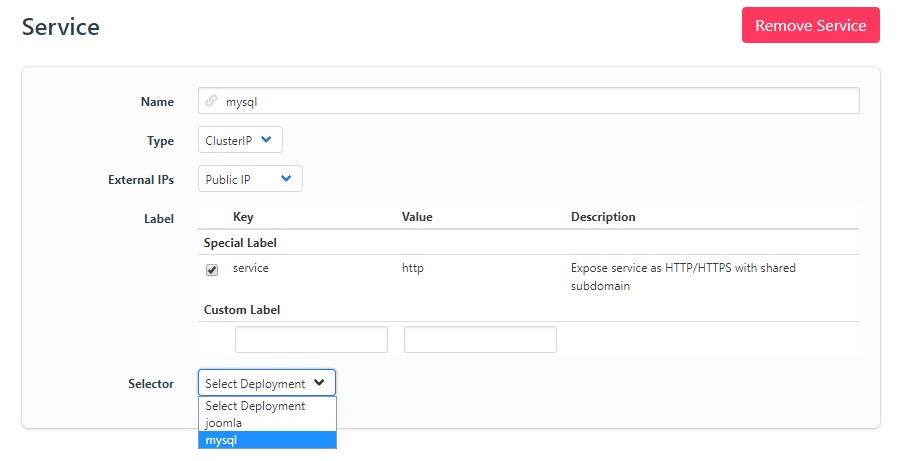
5.3 type in project name and port number. Port number that you type in have to port number of your images inside container likes http:80 ,https:443 or mysql:3306
-
For
Joomla
-
For
MySQL- Port name have to be MySQL and port number have to be 3306
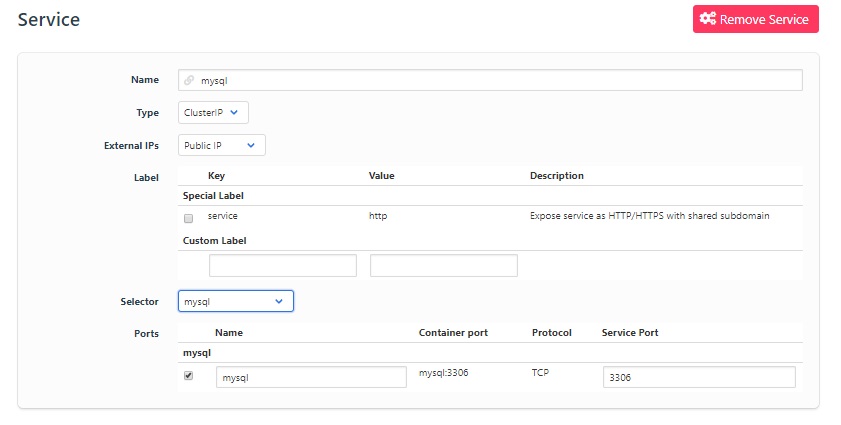
- Port name have to be MySQL and port number have to be 3306
6. When you already click Deploy the project, your project name will be shown on your namespace workload portal.
6.1 Click Deploy
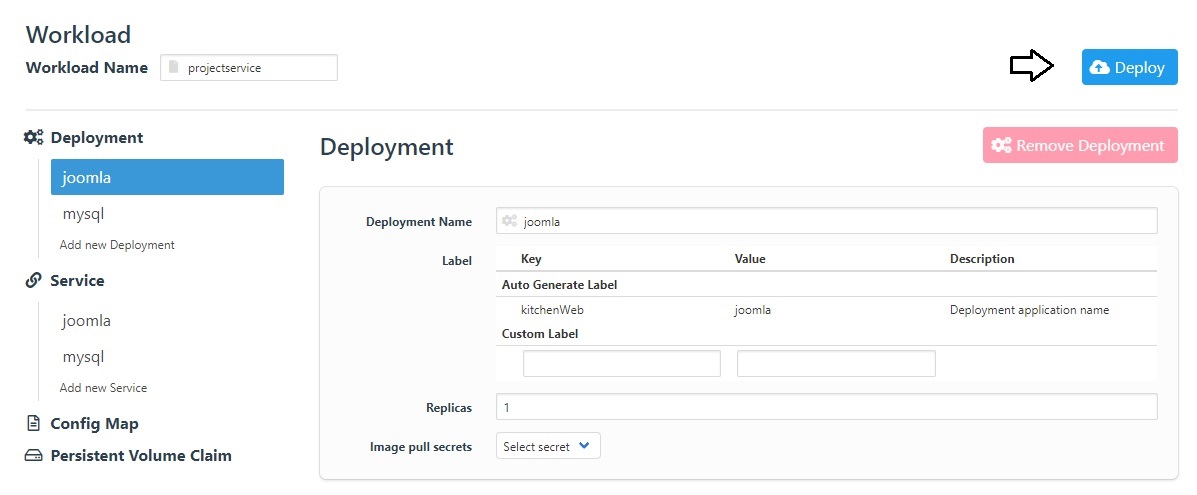
6.2 When you click deploy, it will Show project name on workload portal that already deploy.
7. If you have more than one deployment, click on menu tab on the left hand side to add deployment and then repeat from step 3 to step 5.3
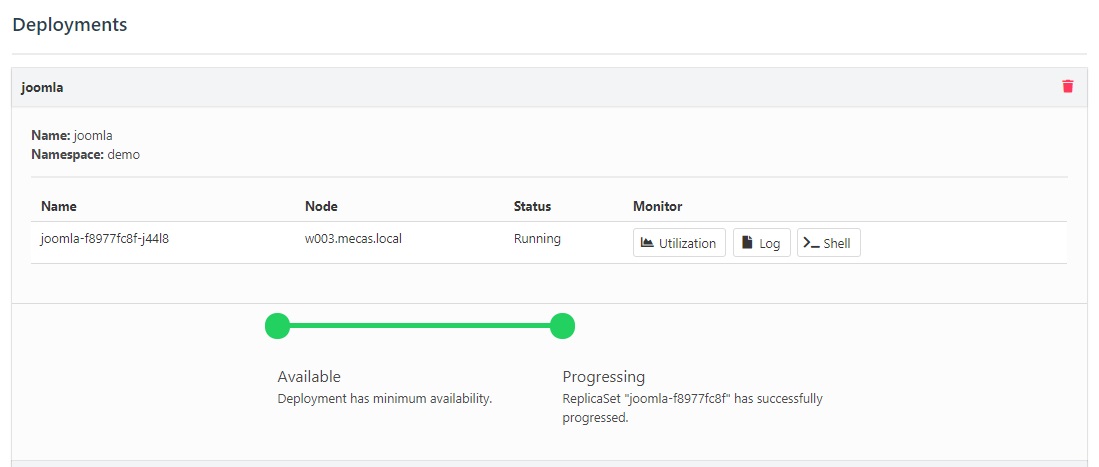
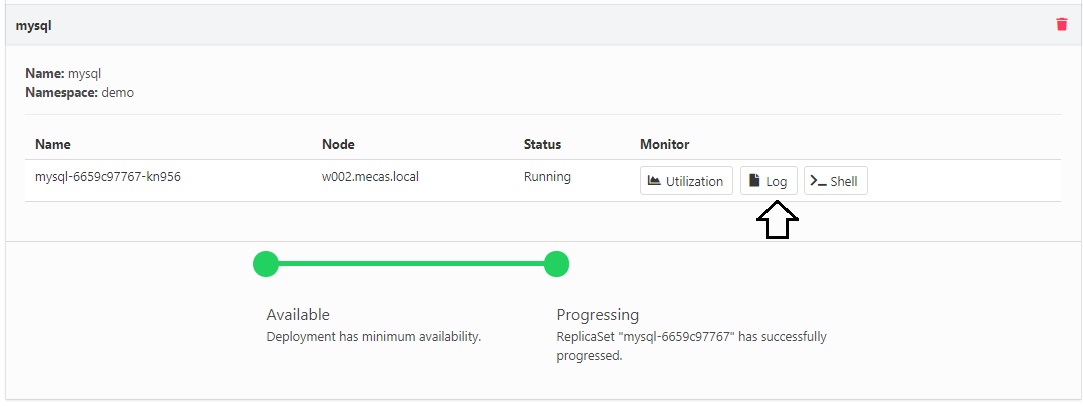
8. Then waiting for progressing period for a while. When you click your project and your project status have green color likes its shown in picture, service is ready to run.

9. You can access website by go to url of Service Name.Name space.web.meca.in.th or click at a project name and scroll down to service part.
- In this part
MySQLcan’t access to website because it isn’t HTTP service.

9.1 If the website cannot access, it will shown
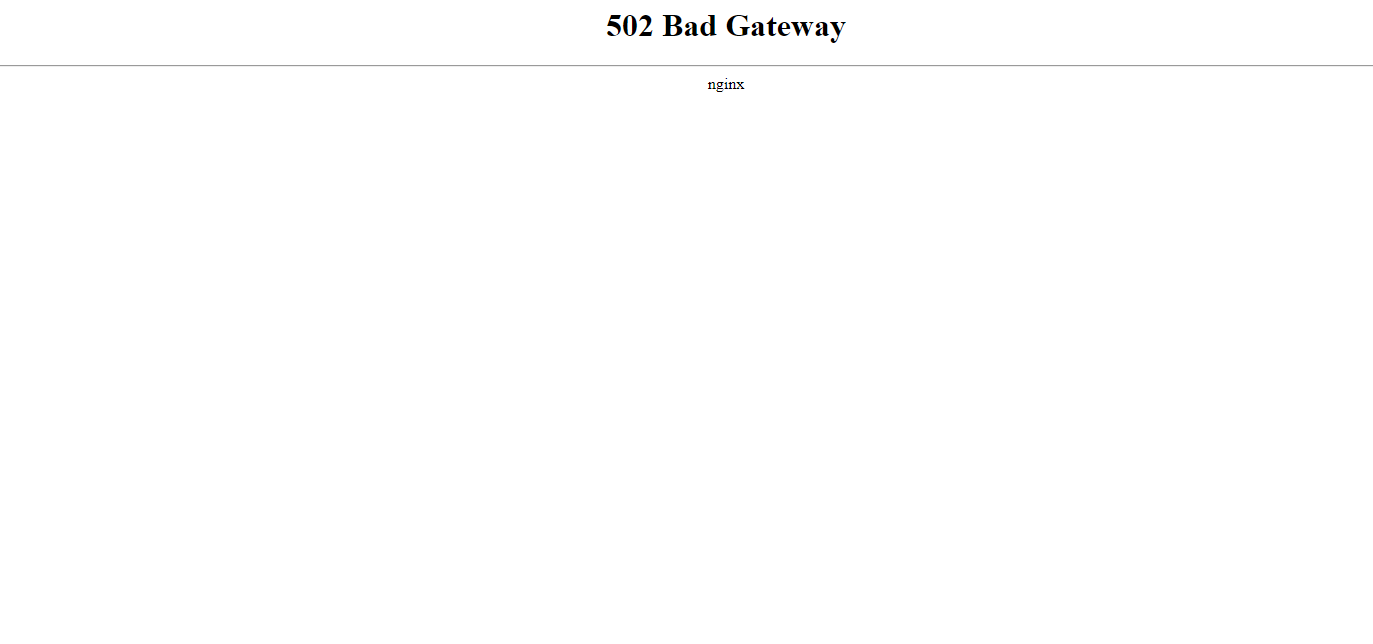
9.1.1 You can check error by click LOG and the error will be shown.
- The most recently problem is the resource is not enough, so you have to request more resouce and add more limit in
Environmentpart of error deployment. In this case, its error in MySQL deployment
- CAUTION: The resource is limit if you request many resource, it will be overload.
10. This is the Joomla & MySQL website. You can create your account, your web url and information about website in this page.
